Bobble stitch is such a fun and useful stitch to learn. If you’re not sure how to do it, check out my How To Do Bobble Stitch quick guide.
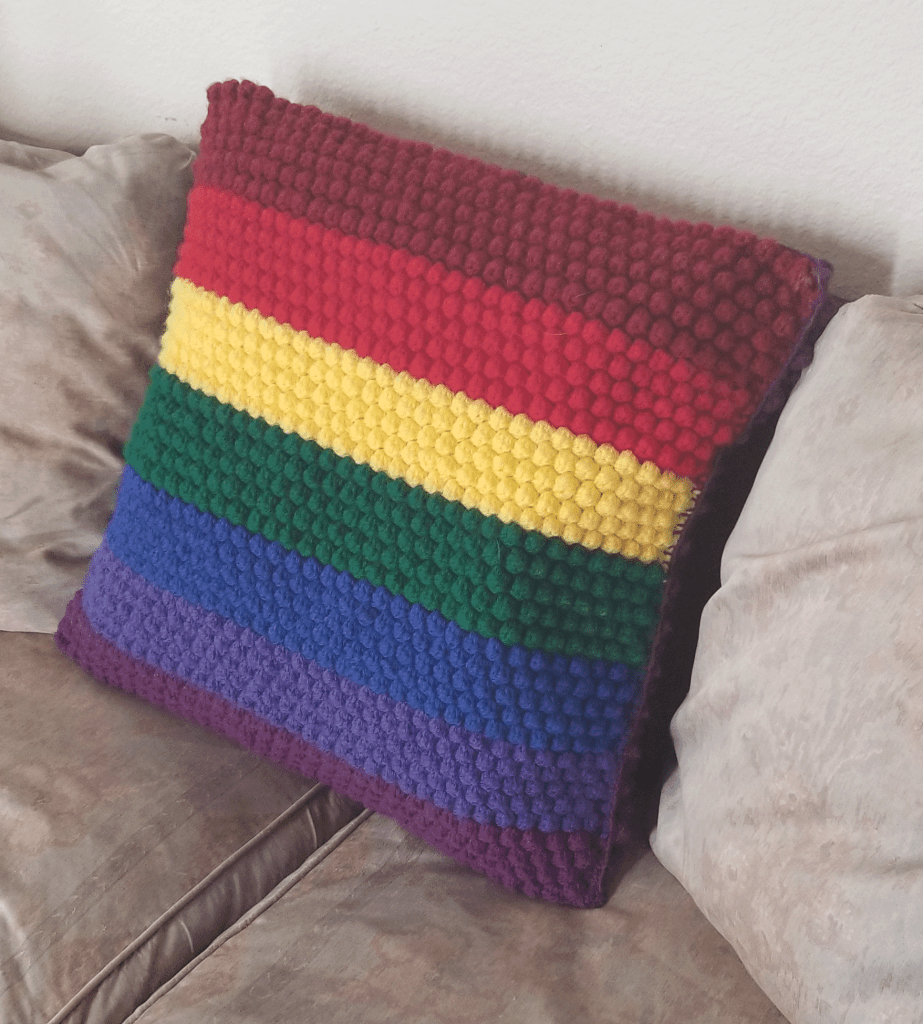
This pattern will take you though how to create your own amazingly textured rainbow cushion cover using bobble stitch. This pattern is also a great way of stash busting as the pattern is three simple repeating rows – you could choose any color combination and I am sure it would come out fantastic!
Bobble stitch is doing 5 double crochet stitches into one stitch, or DC5TOG. Each bobble will always have a single crochet stitch before and after it. Be sure to do these SC stitches fairly tight, in order to let your bobble pop!
When crocheting a pattern that contains bobble stitches, I recommend a long necked crochet hook as you will need to fit 6 loops on it at the same time.
If you would prefer a printable PDF, this pattern is available in my Etsy shop for download here.
Finished Size:
Depending on your tension and yarn thickness, the finished cushion cover should come out at about 20″ by 20″ (51cm by 51 cm)
Recommended Materials:
- Any standard worsted / 4 weight yarn.
- 1 ball each of: Red, Orange, Yellow, Green, Blue, Lilac, Purple
- Crochet hook – 5mm. I recommend a long necked crochet hook as you will need to fit 6 loops on it at the same time.
- Large bodkin/tapestry hook for assembly.
- Pillow form for stuffing. If you are planning to buy a ready made pillow form, I recommend you finish your cover before purchasing to make sure it matches the finished size.
Skills Needed
Single crochet, bobble stitch.
The pattern instructs to create 2 identical bobble stitch sides for your cushion. Bobble stitch is quite yarn hungry! So you may want to do one bobble stitch side and one side a different, less hungry stitch in the correct size.
You will crochet your bobble stitch rows with the bobbles facing away from you, and your SC rows with the bobbles facing towards you.
The bobbles will form an offset pattern, like a honeycomb. If your bobbles start lining up directly below each other, you’ve missed a stitch somewhere. In this picture the yellow arrow shows exactly where I missed a stitch in a different bobble stitch pattern!
Your Pattern
ALWAYS chain 1 to turn at the end of each row, this turning chain does not count as a stitch.
The pattern is made up of three simple repeating rows as follows:
Style 1 69 SC (69)
Style 2 1 SC, [SC, Bo] repeat [] * 33, 2 SC (69)
Style 3 [SC, Bo] repeat [] * 34, 1 SC (69)
The Styles are repeated: 1, 2, 1, 3 – then repeat till the end.
Start with the Red yarn. Chain 70. Start next row in second chain from hook.
Row 1 to 11 follow the repeated row styles as shown above (1, 2, 1, 3, 1, 2, 1, 3, 1, 2, 1)
Change to Orange
Row 12 to 21 (3, 1, 2, 1, 3, 1, 2, 1, 3, 1)
Change to Yellow
Row 22 to 31 ( 2, 1, 3, 1, 2, 1, 3, 1, 2, 1)
Change to Green
Row 32 to 41 (3, 1, 2, 1, 3, 1, 2, 1, 3, 1)
Change to Blue
Row 42 to 51 ( 2, 1, 3, 1, 2, 1, 3, 1, 2, 1)
Change to Lilac
Row 52 to 61 (3, 1, 2, 1, 3, 1, 2, 1, 3, 1)
Change to Purple
Row 62 to 71 ( 2, 1, 3, 1, 2, 1, 3, 1, 2, 1)
Once you have made one side, repeat for the other side.
Now you should have 2 sides for your cushion cover. Measure your finished sides, then buy or make a pillow form that will fit inside. Using the purple yarn and your bodkin, use whip stitch to join 3 sides of the cushion covers together, with the patterns facing outwards. Add the pillow form then finish whip stitching the sides together. Check the cushion for any loose ends and use the bodkin or a crochet hook to sew them in.
I hope you have enjoyed this pattern! Check back again soon for more!